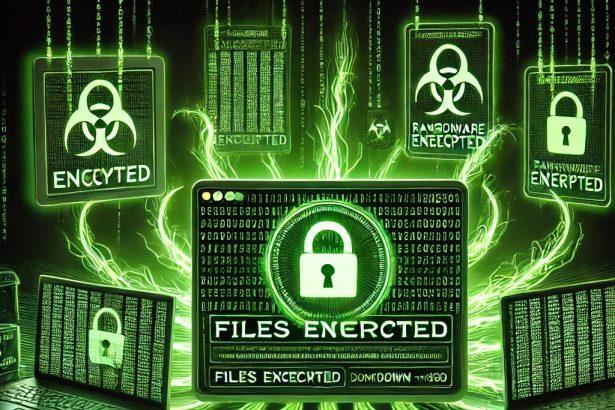
Vect Ransomware is a crypto‑locking malware strain that rapidly encrypts your files and demands a ransom to restore access. It’s a dangerous threat that scrambles data using strong encryption and tries to coerce victims into paying a ransom via a Tor‑hosted negotiation portal.
Vect Ransomware – At‑A‑Glance
| Threat Type | Ransomware / Crypto Virus |
|---|---|
| Encrypted File Extension | .vect |
| Ransom Note Filename | !!!_READ_ME_!!!.txt |
| Email / Contact | Tor negotiation portal + Qtox contact (in some cases) |
| Detection Names | Win64/Qilin variants, Trojan‑Ransom heuristics, generic ransomware flags |
| Symptoms | Files become inaccessible, renamed with .vect, ransom note displayed on desktop |
| Damage & Distribution | File encryption, data exfiltration extortion, emailed or phished droppers, fake installers, malicious ads |
| Danger Level | Very High |
What Is Vect Ransomware?
Vect is a malicious ransomware program that encrypts files on a victim’s machine and appends the .vect extension to them. Once infection begins, it typically changes your desktop wallpaper and drops a ransom note (!!!_READ_ME_!!!.txt) detailing instructions on how to contact the attackers via a Tor website to negotiate decryption.
Unlike simple nuisance software, Vect also claims to steal sensitive data before encryption and threatens to publish it if the ransom isn’t paid.
How Did Vect Ransomware Infect My Computer?
Vect ransomware can arrive on your system through:
- Malicious email attachments disguised as invoices, documents, or installers
- Fake software cracks or pirated application bundles
- Drive‑by downloads from compromised or deceptive websites
- Exploiting unpatched software vulnerabilities
- Social engineering (e.g., bogus “support” messages)
Once executed, its installer begins encrypting files and can spread across connected drives and network shares if not contained.
What Happens to Your Files?
When Vect activates:
- Your personal and work files are encrypted using strong cryptography.
- Each encrypted file is renamed to include
.vect. - A ransom note pops up on your desktop and a text file appears, demanding payment and telling you how to access a Tor site for negotiations.
- In some cases, attackers claim they’ve exfiltrated data (like databases or backups) and threaten public release.
Important: Without backups, encrypted files are usually not decryptable with standard tools — paying the ransom doesn’t guarantee restoration and may fuel further attacks.
Vect Ransom Note & Extortion
The ransom note from Vect typically claims:
- Your files were encrypted with a strong algorithm (e.g., ChaCha20 or similar).
- You must use the Tor Browser to reach their negotiation portal.
- They may offer a small test decryption to prove they can unlock files.
- You should not modify encrypted files or use third‑party tools before paying.
These warnings are designed to pressure victims — they are not technical safeguards and should be treated with extreme caution.
How to Remove Vect Ransomware
1. Isolate the Infected Machine
Disconnect the affected computer from the network and internet to prevent lateral spread to other systems.
2. Power Down Shared Devices
Unplug external drives, NAS units, or USB devices until after the threat is removed.
3. Scan with Reputable Security Software
Use a trusted anti‑malware tool to perform a full system scan and remove the ransomware binary. Tools like Combo Cleaner or similar products can help detect and remove remnants of the malware.
4. Restore From Backups
If you maintain regular offline backups, restore your encrypted files from a clean backup source.
5. Report the Incident
Notify law enforcement or your local cybercrime response team — documenting the attack can help with broader threat intelligence.
Can I Decrypt Vect Without Paying?
At this time, free decryption tools specific to Vect are not widely available. Because it uses modern encryption methods, files are generally locked unless you:
- Restore from backup
- Use professional data recovery services
- In rare cases, exploit implementation flaws (if discovered by researchers)
Paying the ransom is strongly discouraged — there’s no guarantee attackers will provide a working decryption key, and it encourages further malicious activity.
How to Protect Yourself in the Future
- Keep all systems patched and updated.
- Use a reputable, updated antivirus solution.
- Back up data regularly to offline or segmented storage.
- Avoid opening attachments from unknown senders.
- Be cautious downloading software from unofficial sources.
Conclusion
Vect Ransomware is a serious and dangerous malware that locks crucial data and extorts victims. Immediate containment, removal with professional tools, and restoring from backups are your best options — never negotiate or pay unless as a last resort and guided by experts.
Manual Ransomware Removal Guide
Warning: Manual removal is complex and risky. If not done correctly, it can lead to data loss or incomplete removal of ransomware. Only follow this method if you are an advanced user. If unsure, proceed with Method 2 (SpyHunter Removal Guide).
Step 1: Disconnect from the Internet
- Unplug your Ethernet cable or disconnect Wi-Fi immediately to prevent further communication with the ransomware’s command and control (C2) servers.
Step 2: Boot into Safe Mode
For Windows Users:
- For Windows 10, 11:
- Press Windows + R, type
msconfig, and hit Enter. - Go to the Boot tab.
- Check Safe boot and select Network.
- Click Apply and OK, then restart your PC.
- Press Windows + R, type
- For Windows 7, 8:
- Restart your PC and press F8 repeatedly before Windows loads.
- Select Safe Mode with Networking and press Enter.
For Mac Users:
- Restart your Mac and immediately press and hold the Shift key.
- Release the key once you see the Apple logo.
- Your Mac will start in Safe Mode.
Step 3: Locate and Terminate Malicious Processes
For Windows Users:
- Press Ctrl + Shift + Esc to open Task Manager.
- Look for suspicious processes (e.g., unknown names, high CPU usage, or random letters).
- Right-click on the process and select End Task.
For Mac Users:
- Open Activity Monitor (Finder > Applications > Utilities > Activity Monitor).
- Look for unusual processes.
- Select the process and click Force Quit.
Step 4: Delete Malicious Files
For Windows Users:
- Press Windows + R, type
%temp%, and hit Enter. - Delete all files in the Temp folder.
- Navigate to:
C:\Users\[Your Username]\AppData\RoamingC:\Users\[Your Username]\AppData\LocalC:\Windows\System32
- Look for suspicious files related to the ransomware (random file names, recently modified) and delete them.
For Mac Users:
- Open Finder and go to Go > Go to Folder.
- Type
~/Library/Application Supportand delete suspicious folders. - Navigate to
~/Library/LaunchAgentsand remove unknown.plistfiles.
Step 5: Remove Ransomware from Registry or System Settings
For Windows Users:
Warning: Incorrect changes in the Registry Editor can damage your system. Proceed with caution.
- Press Windows + R, type
regedit, and hit Enter. - Navigate to:
HKEY_CURRENT_USER\SoftwareHKEY_LOCAL_MACHINE\Software
- Look for unfamiliar folders with random characters or ransomware-related names.
- Right-click and select Delete.
For Mac Users:
- Go to System Preferences > Users & Groups.
- Click on Login Items and remove any suspicious startup items.
- Navigate to
~/Library/Preferencesand remove malicious.plistfiles.
Step 6: Restore System Using System Restore (Windows) or Time Machine (Mac)
For Windows Users:
- Press Windows + R, type
rstrui, and hit Enter. - Click Next, choose a restore point before the infection, and follow the prompts to restore your system.
For Mac Users:
- Restart your Mac and hold Command + R to enter macOS Utilities.
- Select Restore from Time Machine Backup.
- Choose a backup prior to the ransomware infection and restore your system.
Step 7: Use a Decryption Tool (If Available)
- Visit No More Ransom (www.nomoreransom.org) and check if a decryption tool is available for your ransomware variant.
Step 8: Recover Files Using Backup
- If you have backups on an external drive or cloud storage, restore your files.
Automatic Ransomware Removal Using SpyHunter
If manual removal seems too risky or complicated, using a reliable anti-malware tool like SpyHunter is the best alternative.
Step 1: Download SpyHunter
Download SpyHunter from the official link: Download SpyHunter
Or follow the official installation instructions here:
SpyHunter Download Instructions
Step 2: Install SpyHunter
- Open the downloaded file (
SpyHunter-Installer.exe). - Follow the on-screen prompts to install the program.
- Once installed, launch SpyHunter.
Step 3: Perform a Full System Scan
- Click on Start Scan Now.
- SpyHunter will scan for ransomware and other malware.
- Wait for the scan to complete.
Step 4: Remove Detected Threats
- After the scan, SpyHunter will list all detected threats.
- Click Fix Threats to remove the ransomware.
Step 5: Use SpyHunter’s Malware HelpDesk (If Needed)
If you are dealing with a stubborn ransomware variant, SpyHunter’s Malware HelpDesk provides custom fixes to remove advanced threats.
Step 6: Restore Your Files
If your files are encrypted:
- Try No More Ransom (www.nomoreransom.org) for decryption tools.
- Restore from cloud storage or external backups.
Preventing Future Ransomware Attacks
- Keep backups on an external hard drive or cloud storage.
- Use SpyHunter to detect threats before they infect your system.
- Enable Windows Defender or a trusted antivirus program.
- Avoid suspicious emails, attachments, and links.
- Update Windows, macOS & software regularly.