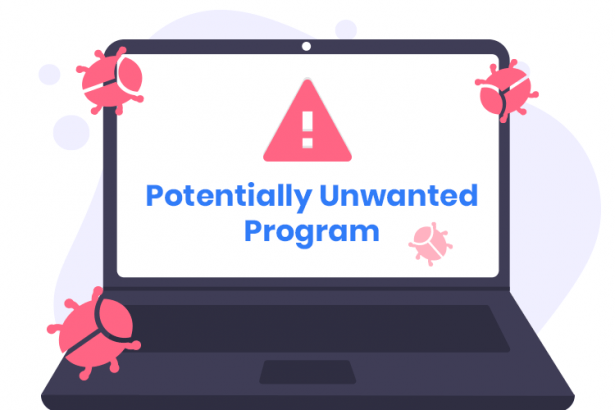
WNS Protect Pro is marketed as a PC optimization and protection tool, but in reality, it often causes more problems than it solves. Once installed, it may display exaggerated security alerts, push you toward unnecessary paid upgrades, and slow down system performance. Many users find it installed without clear consent, bundled with freeware or misleading “update” prompts.
- Why WNS Protect Pro Installs Without Consent
- What WNS Protect Pro Does in the Background
- Complete Guide to Removing Potentially Unwanted Programs (PUPs)
- Manual Removal Guide for Windows & Mac
- Step 1: Uninstall Suspicious Programs
- Step 2: Remove PUP-Related Browser Extensions
- Step 3: Reset Browser Settings (If Necessary)
- Step 4: Check for Leftover PUP Files
- Automatic PUP Removal Using SpyHunter
- Final Recommendations
- Conclusion
| Threat Type | Potentially Unwanted Program (PUP) |
|---|---|
| Detection Names | PUA:Win32/WNSProtectPro, Win32/WNSProtectPro, PUP.Optional.WNSProtectPro |
| Symptoms | Fake scan results, frequent pop-ups, system slowdowns, altered browser settings |
| Damage & Distribution | Bundled installers, deceptive download sites, misleading security alerts |
| Danger Level | Medium |
| SpyHunter Link | Download SpyHunter to Remove WNS Protect Pro |
Why WNS Protect Pro Installs Without Consent
WNS Protect Pro often piggybacks on other software installers, especially free utilities from third-party sites. These bundles include “pre-checked” installation boxes that many users skip past during setup. In other cases, deceptive ads posing as security updates or “PC health checks” can trigger its download.
What WNS Protect Pro Does in the Background
Once active, WNS Protect Pro runs regular scans that tend to flag harmless items as threats. This tactic pressures users into paying for a “full” version to fix the so-called issues. It may also alter browser settings, display persistent notifications, and launch at Windows startup, consuming memory and CPU resources.
Complete Guide to Removing Potentially Unwanted Programs (PUPs)
Potentially Unwanted Programs (PUPs) infiltrate devices through software bundling and can cause slow performance, intrusive ads, and security risks. This guide provides manual removal instructions for Windows and Mac users, along with an automated method using SpyHunter.
Manual Removal Guide for Windows & Mac
If you suspect a PUP is installed on your system, follow these steps to remove it manually.
Step 1: Uninstall Suspicious Programs
Windows Users
- Open Control Panel:
- Press Win + R, type
appwiz.cpl, and hit Enter.
- Press Win + R, type
- Locate and Remove Unwanted Programs:
- Look for unfamiliar or suspicious applications.
- Right-click the program and select Uninstall.
- Follow the Uninstallation Process:
- If prompted, confirm by clicking Yes.
Mac Users
- Open Finder → Click Applications.
- Find and Remove Suspicious Apps:
- Look for programs that you don’t remember installing.
- Move to Trash:
- Drag the unwanted application to Trash.
- Empty the Trash:
- Right-click the Trash icon and select Empty Trash.
Step 2: Remove PUP-Related Browser Extensions
PUPs often install browser extensions that display ads or redirect search results.
Google Chrome
- Open Chrome → Click the three-dot menu.
- Go to More Tools → Extensions.
- Find any suspicious extensions and click Remove.
Mozilla Firefox
- Open Firefox → Click the Menu button (≡).
- Select Add-ons and themes → Extensions.
- Remove any unwanted extensions.
Microsoft Edge
- Open Edge → Click the three-dot menu.
- Select Extensions → Manage Extensions.
- Locate and Remove any unknown extensions.
Safari (Mac)
- Open Safari → Click Safari in the menu bar → Preferences.
- Navigate to the Extensions tab.
- Find and Uninstall any unfamiliar extensions.
Step 3: Reset Browser Settings (If Necessary)
If PUPs have altered your browser settings, reset them.
Google Chrome
- Open Chrome → Click three-dot menu → Settings.
- Scroll down and select Reset settings.
- Click Restore settings to their original defaults → Confirm.
Mozilla Firefox
- Open Firefox → Click Menu (≡) → Help.
- Select More Troubleshooting Information.
- Click Refresh Firefox and confirm.
Microsoft Edge
- Open Edge → Click Settings.
- Select Reset settings → Restore settings to their default values.
- Confirm the reset.
Safari (Mac)
- Open Safari → Click Safari in the menu bar.
- Select Clear History → Choose All History → Click Clear History.
Step 4: Check for Leftover PUP Files
Even after uninstallation, some PUPs leave traces behind.
Windows
- Press Win + R, type
%temp%, and press Enter. - Delete all files in the Temp folder.
- Repeat the process for:
%appdata%%localappdata%C:\ProgramData
Mac
- Open Finder → Click Go → Go to Folder.
- Enter:javascriptCopyEdit
~/Library/Application Support/ - Look for and delete suspicious folders.
Automatic PUP Removal Using SpyHunter
For a faster, more thorough, and easier solution, use SpyHunter, an advanced anti-malware tool.
Step 1: Download and Install SpyHunter
- Go to the official SpyHunter download page:
- Click the Download button and follow the installation instructions.
Step 2: Scan Your System
- Launch SpyHunter.
- Click Start Scan Now to initiate a full system scan.
- Wait for SpyHunter to detect any PUPs and malware.
Step 3: Remove Detected Threats
- Click Fix Threats to remove all detected PUPs.
- Restart your computer to complete the cleanup.
For detailed SpyHunter download and installation steps, refer to: SpyHunter Installation Guide
Final Recommendations
- Avoid Software Bundles: Always choose custom installation when installing free software.
- Use an Anti-Malware Tool: SpyHunter ensures your system stays protected from PUPs.
- Regularly Check Installed Programs & Browser Extensions: Be proactive in removing suspicious apps.
By following this guide, you can effectively remove and prevent Potentially Unwanted Programs (PUPs). If you want a quick and effortless solution, use SpyHunter to scan and remove threats.
Download SpyHunter for PUP Removal: SpyHunter Official Download
Conclusion
WNS Protect Pro’s aggressive alerts and questionable installation tactics make it more of a nuisance than a security asset. Removing it with a reputable anti-malware tool ensures it’s gone completely, along with any associated files or registry changes.